Archive for the ‘Uncategorized’ Category

Final work on rafters.

Posted: January 27, 2017 in Uncategorized
img_7491

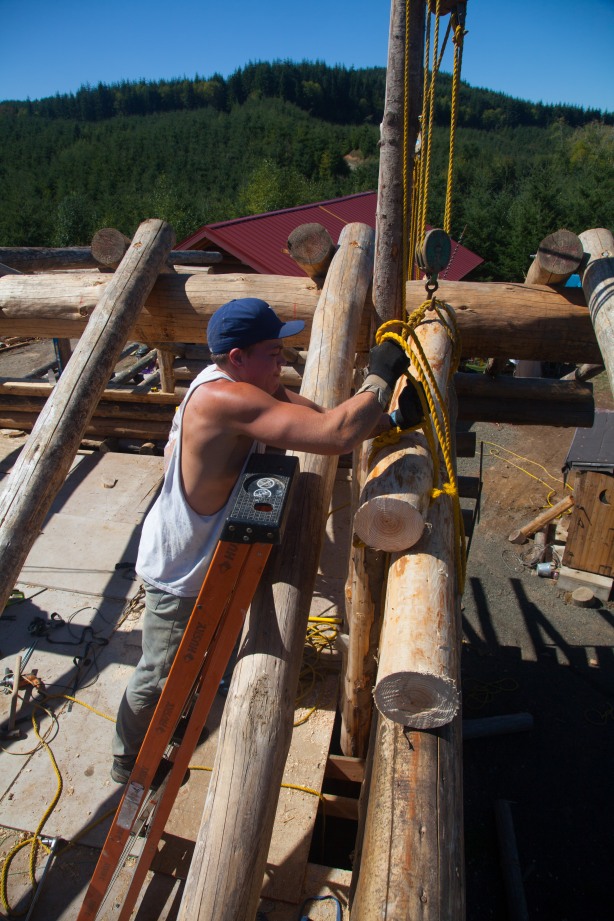
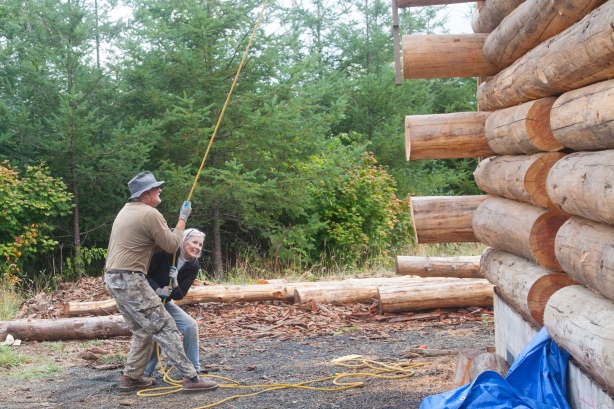
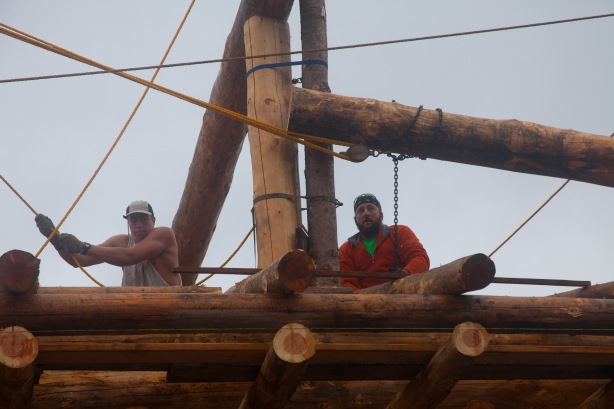
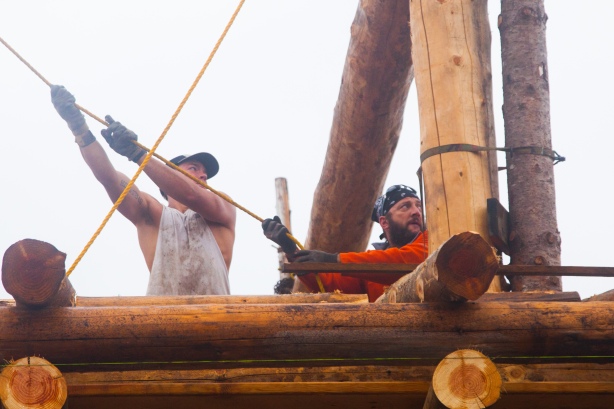
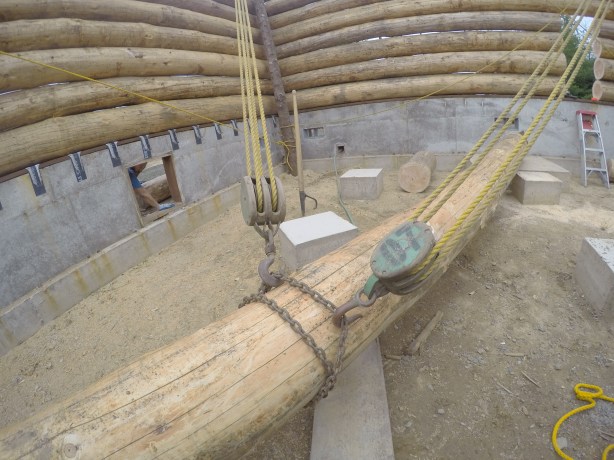
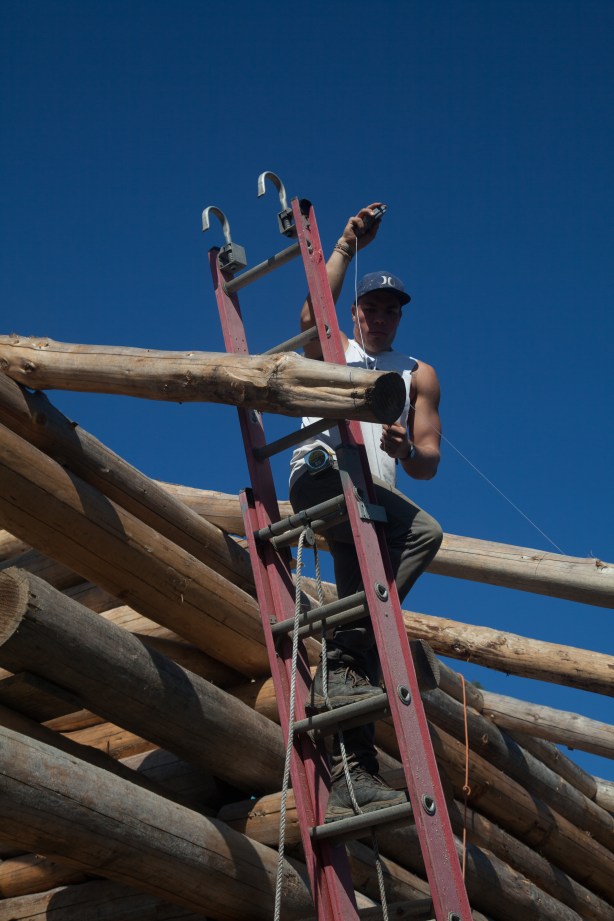
Tyler is removing the block and tackle from the lifting poles.  Again…possibly the most important pieces of equipment used in building our cabins…the BLOCK AND TACKLE.  

img_7500

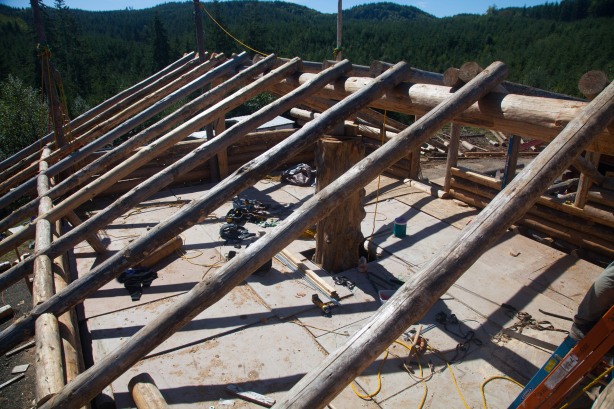
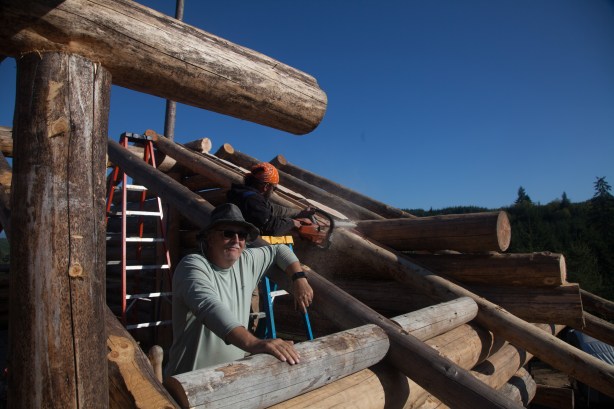
If you look close on the right side of the photo you will see a 2×4 screwed into the wall logs at the same angle as the rafters.  Then you may see an orange piece of steel riding on the 2×4 attached to Rob’s saw blade.  That keeps his blade at the same angle as the rafter so when we bring the decking over the rafter it hits the gable logs flush.

img_7501

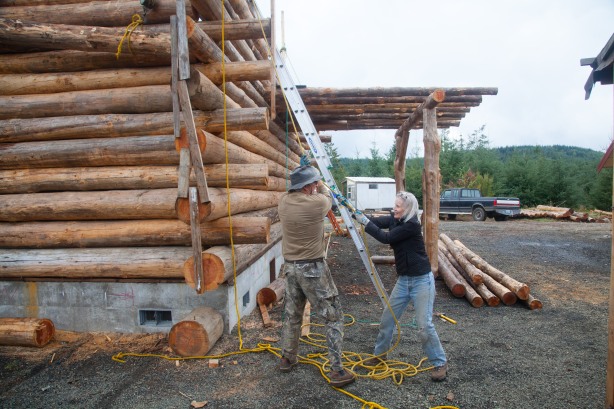
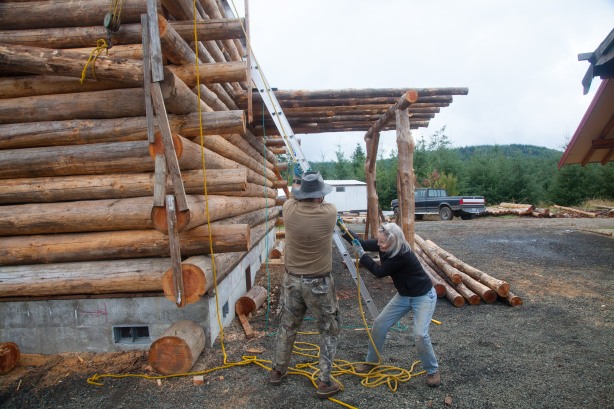
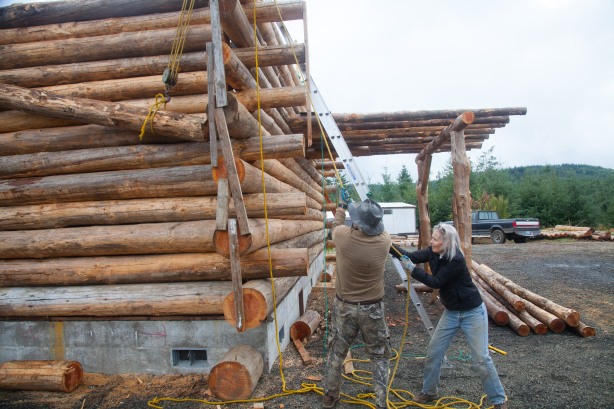
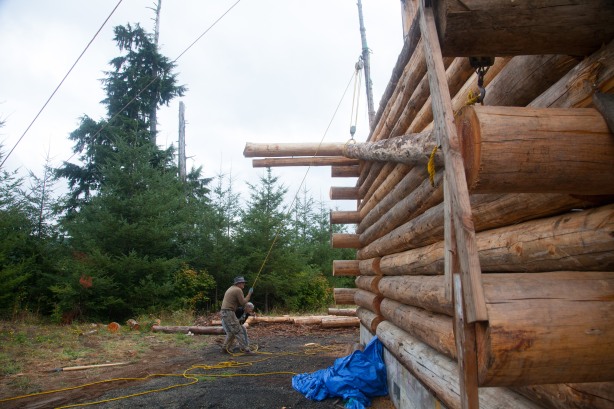
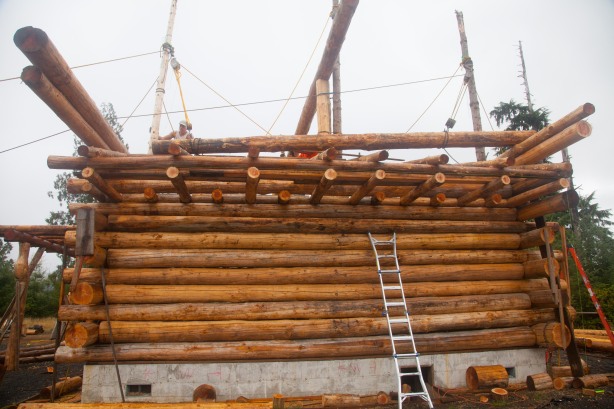
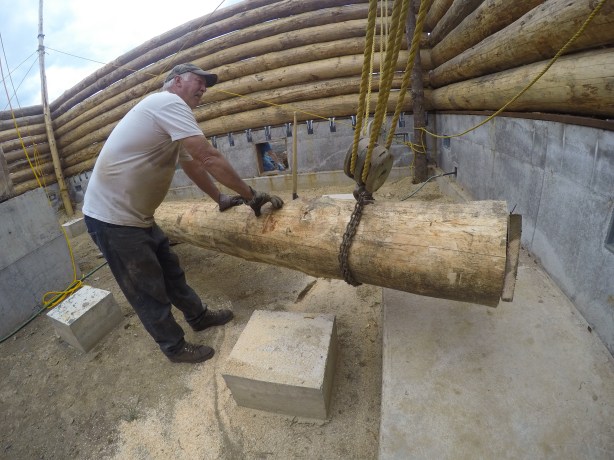
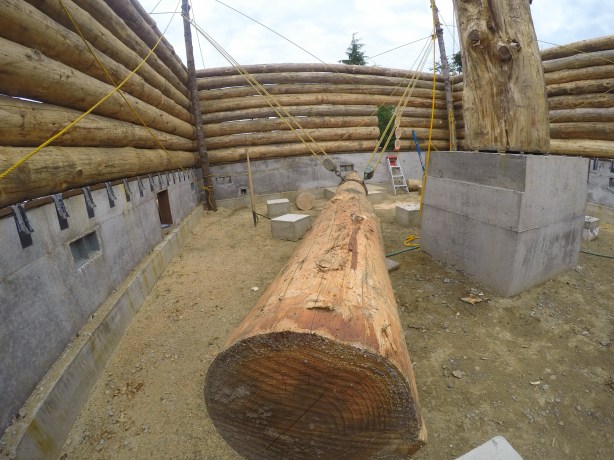
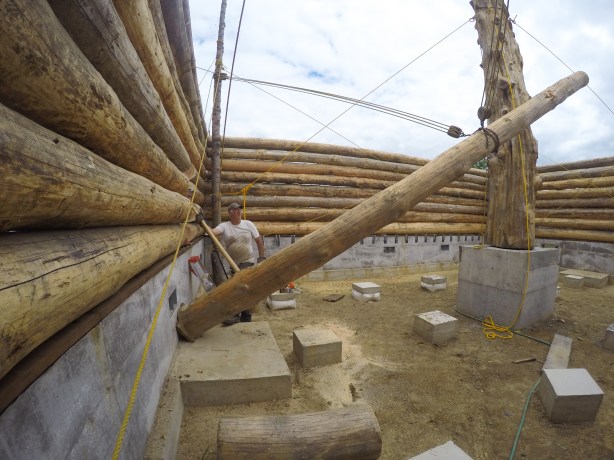
Tyler is removing the key logs to building this structure…the LIFTING POLES.  The lifting poles were buried into the ground 3′ and extended over 24′ into the air.  Sets of pulleys were hung and used to lift every log.

img_7512

Rob is working on the metal straps that will be installed to satisfy the engineer on wind sheer.  Years ago there were 130mph winds here and the codes have gotten more strict.

img_7545

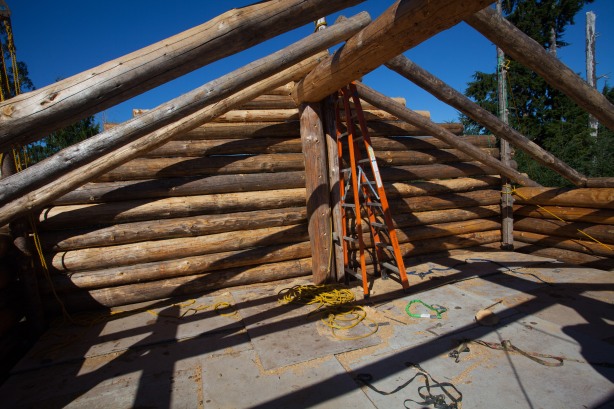
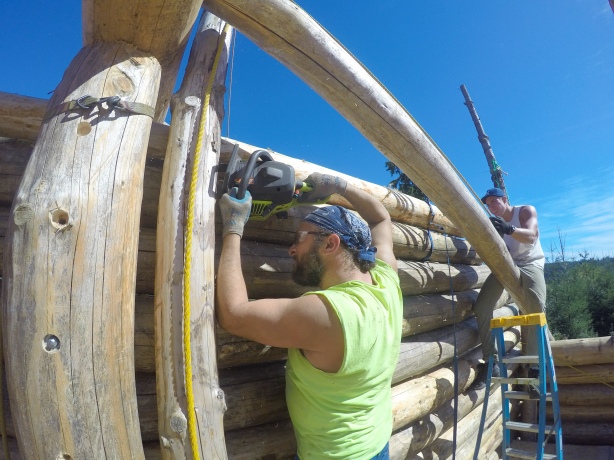
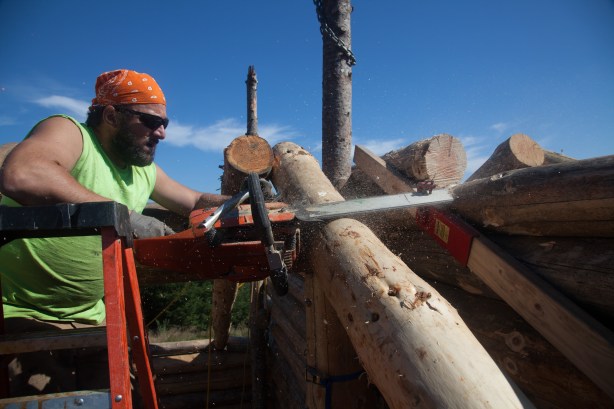
Gable logs are being cut to match the rafter pitch.

img_7552

img_7560

This photo of the elk was taken 50′ from our front door!

img_7571

img_7576

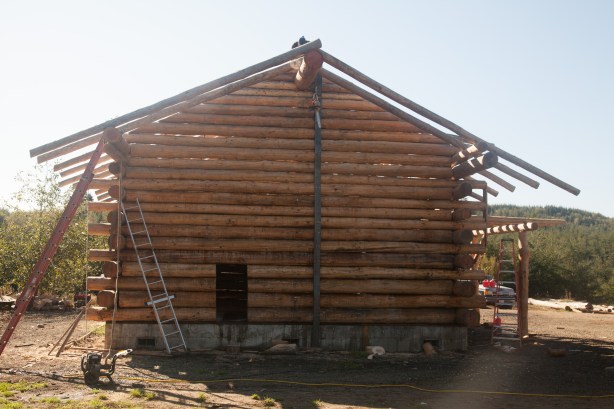
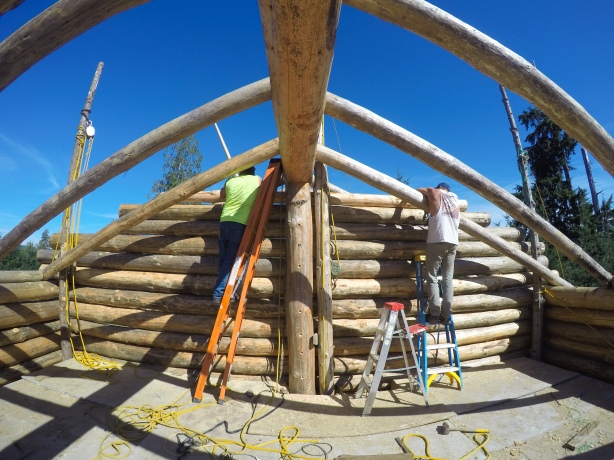
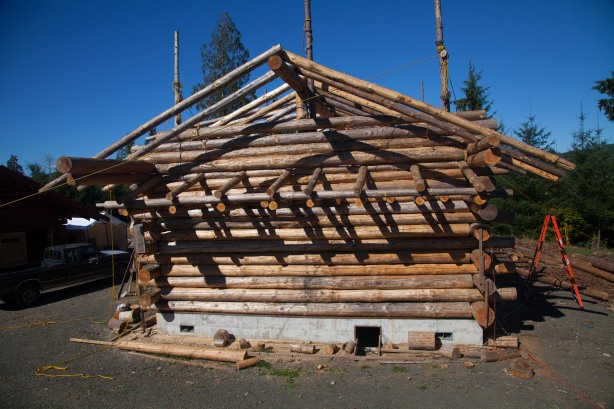
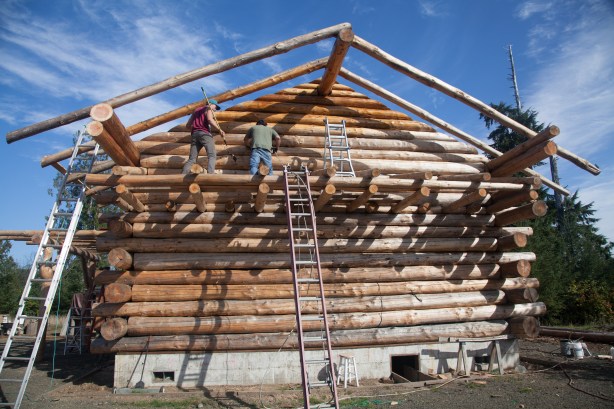
This is the north end of our cabin.  There will be a wrap around deck, 6′ wide french doors and an 8’x6′ picture window on the lower half and large windows above.  

img_7601

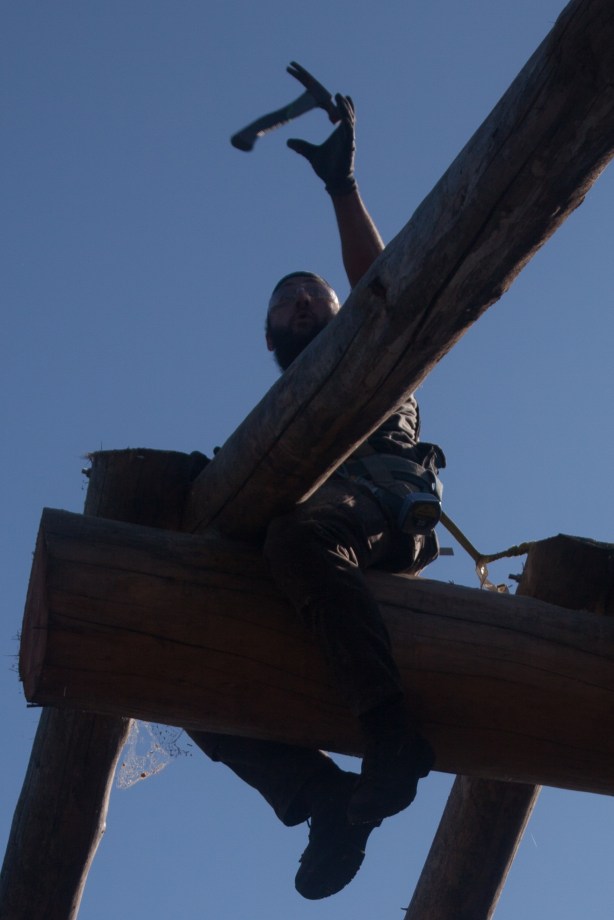
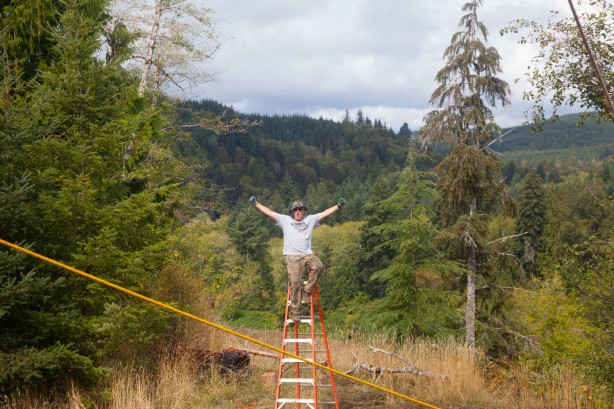
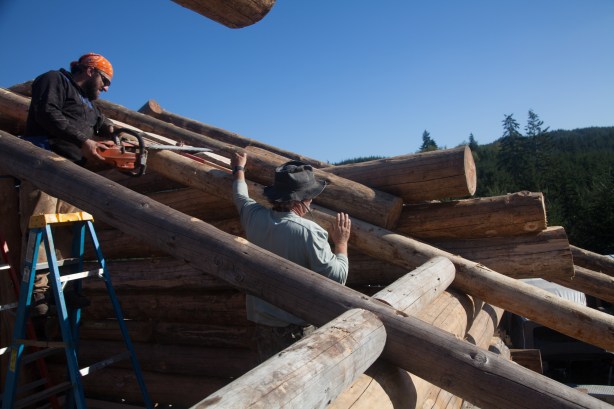
Good throw and catch!
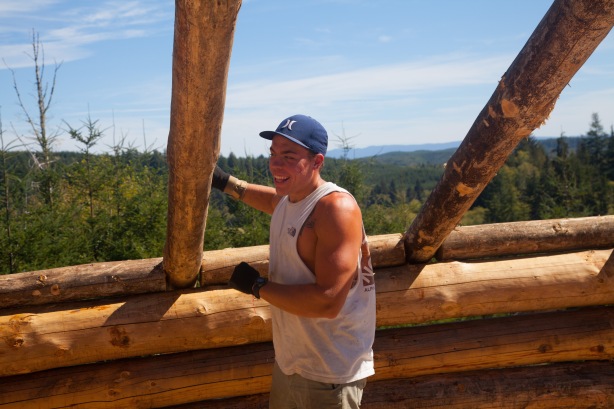
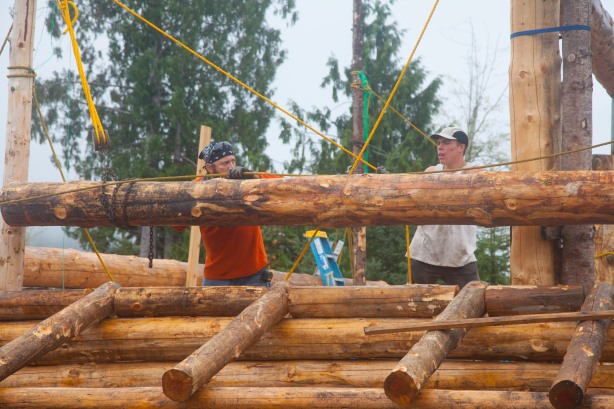
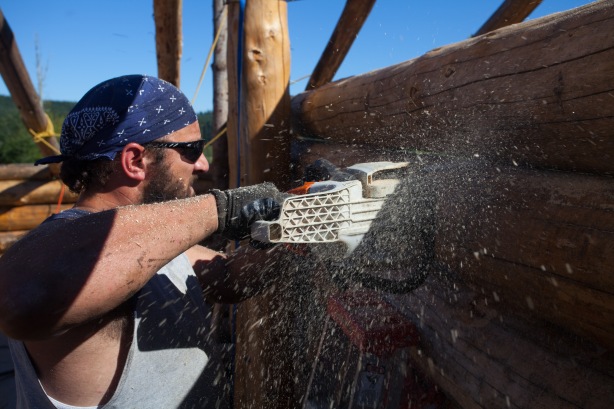
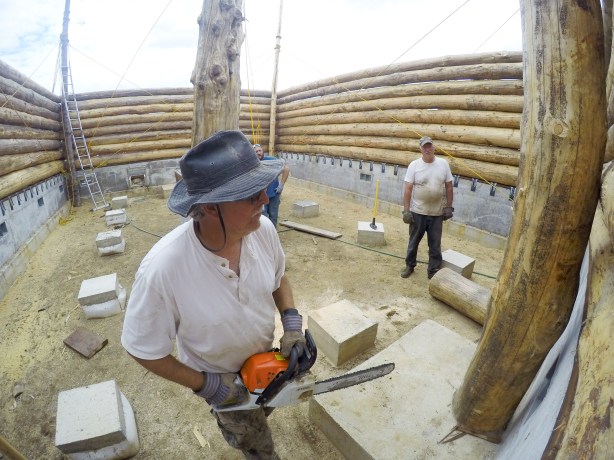
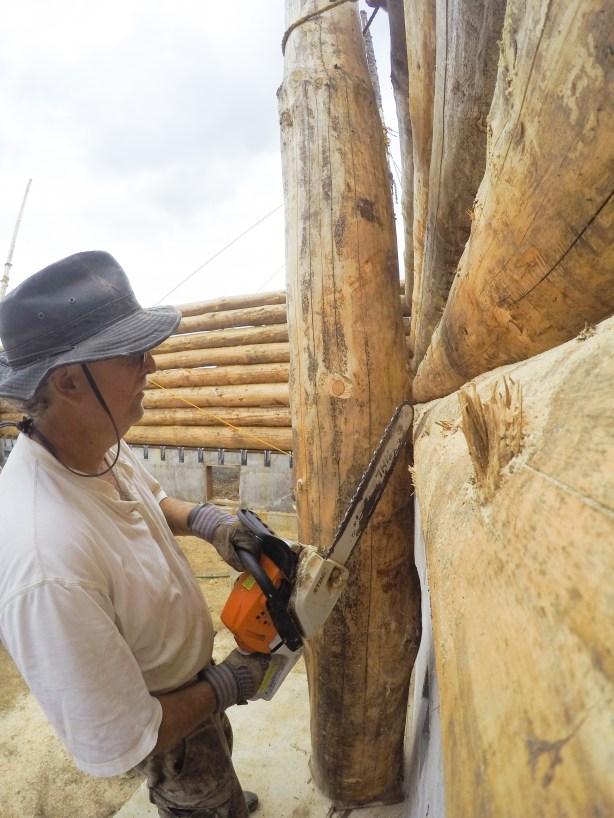
img_7605

Rob in his element.

img_7607

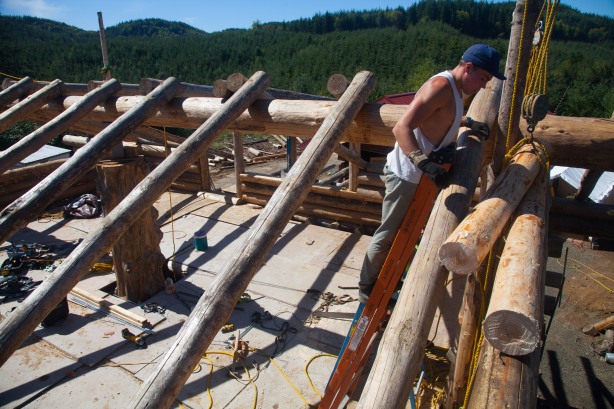
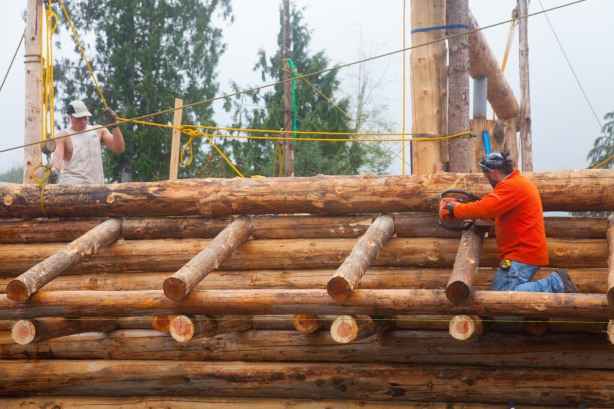
Tyler is stretching a line to cut the rafter ends evenly.

img_7613

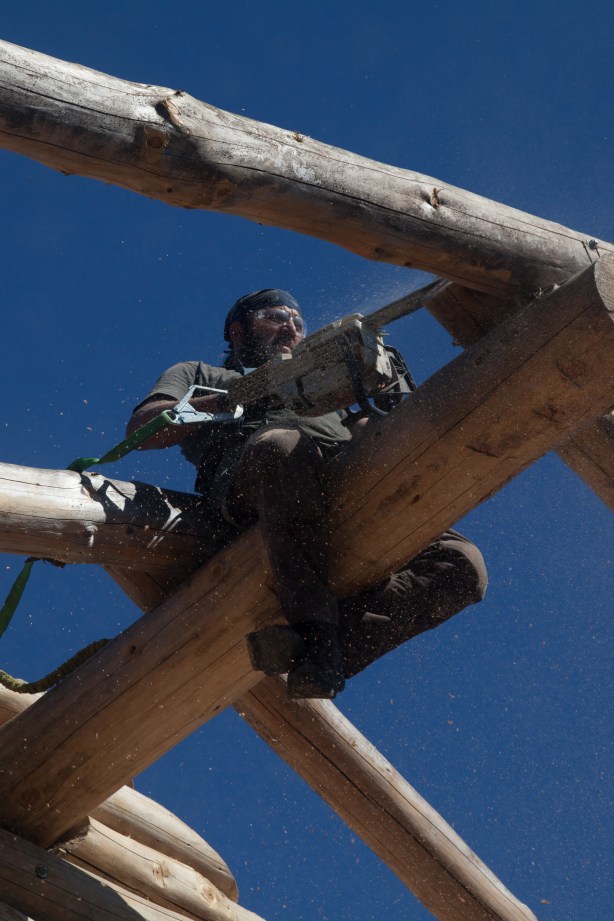
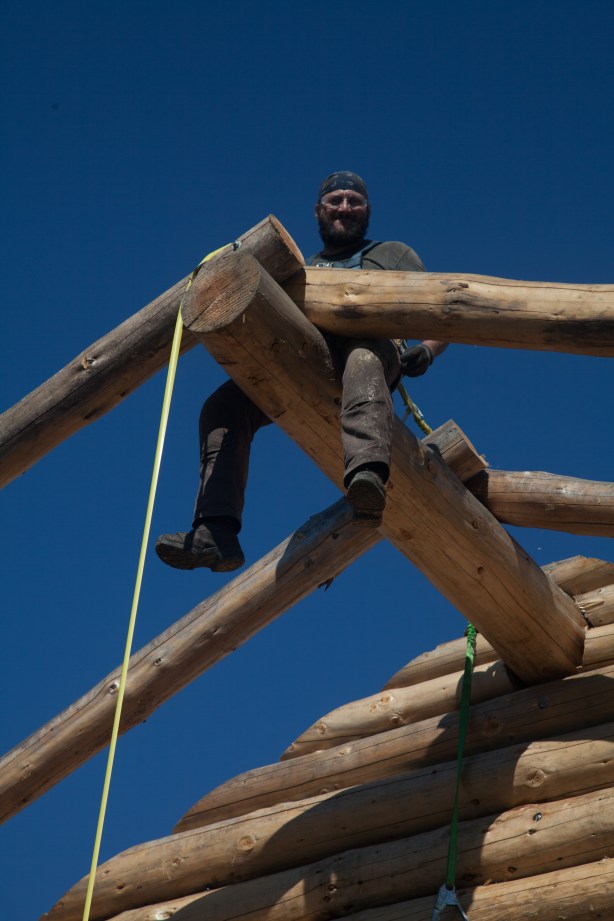
Rob is strapped in for safety.  He is trimming the ends of the rafters.  He is perched on the ridgepole which is 50′ long and overhangs each end of the cabin by 8′.  With the decking going 2′ beyond that we will have a total of a 10′ overhang to protect our logs.

img_7636

South end of the cabin.  We added a short ‘hip’ roof to add protection for logs below.  The guys are busy sealing the logs.  Brings out the color and protects from rain and UV rays.

Gable Logs

Posted: September 8, 2016 in Uncategorized
DCIM100GOPROGOPR1712.

Rob and Tyler work to position the last of the gable wall logs on the north end.

img_7462

Tyler spent the last part of the summer helping build with us.  Thanks Tyler…without your help we couldn’t have pulled it off.  All we had to do was keep him fed and in front of a TV whenever FSU or the Bucs were playing.

img_7461

When logs are stacked on top of each other there are always knots and bumps to impede that close fit.  To remedy that we are constantly using our cordless saw(chainsaw) to remove the knots and bring the logs together.

img_7460

img_7449

All the rafters are up and in position.

img_7203

As the gable walls got higher I had to get higher to see the gap between the logs and call out the best fit.  This is also a nice shot of our view to the north.  Without the clouds we are able to see the southern end of the Olympic Mountains.

img_7450

It got easier to lift logs towards the top.

img_7459

Quite a view at the top from all directions. 

img_7193

Bonnie and I decided to give this log a try.  You can see the log in the upper left corner.

img_7457img_7199img_7191img_7187img_7180img_7166img_7176img_7171img_7162img_7159img_7154img_7471img_7469img_7463DCIM100GOPROGOPR1714.


DCIM100GOPROGOPR1704.

Rob is drilling 1/2″ holes in our north end ridgepole post.  We put treaded rod through both the post and the wall log for wall stability.  The smaller vertical log is the ridgepole lifting pole that was used in several lifting situations.  We are pretty much done with it so it will be cut and pulled out of there shortly.

Rafters are 8” at the top and 6” at the bottom(eaves).  They are assembled on the ground in pairs.  Two logs are laid side by side…overlapping 11” at the 8” end.  Clamped…or strapped so they are secure together then drilled so a 1/2” AT(all thread) can be tapped through and connected with washer and nut.  The set is now connected and ‘hinged’ at the center.  Pulleys are then used as normal to lift onto the wall.  Once at the wall the lift points are shifted allowing a second pulley set to be used to pull set over the ridgepole.  As the rafter set is pulled over the ridgepole it falls onto the far wall with great force once past the ‘tipping point’.  Always an exciting moment.  Once on the ridgepole a layout is made and rafter sets are moved into position.  We use 5/8” lags to secure the rafters on the wall and on the ridgepole.  Bonnie and I has some great help while putting rafters up this year…Jason and Katie…both graduates of the Onalaska Log Building School came over with their Monster Van and were lifesavers.  We ended up being short two rafters and had to go back into the woods to fall four more trees.  Jason and Katie made it easy with their Monster Van.  With all the trouble we had getting those trees to lay down we should have just chained up the trees to the hitch of that nasty van and just had Jason drive home.  It sure would have made it simpler!  Thanks Jason and Katie! 

Rafters!

Posted: September 5, 2016 in Uncategorized

This slideshow requires JavaScript.

Rafters are 8” at the top and 6” at the bottom(eaves).  They are assembled on the ground in pairs.  Two logs are laid side by side…overlapping 11” at the 8” end.  Clamped…or strapped so they are secure together then drilled so a 1/2” AT(all thread) can be tapped through and connected with washer and nut.  The set is now connected and ‘hinged’ at the center.  Pulleys are then used as normal to lift onto the wall.  Once at the wall the lift points are shifted allowing a second pulley set to be used to pull set over the ridgepole.  As the rafter set is pulled over the ridgepole it falls onto the far wall with great force once past the ‘tipping point’.  Always an exciting moment.  Once on the ridgepole a layout is made and rafter sets are moved into position.  We use 5/8” lags to secure the rafters on the wall and on the ridgepole.  Bonnie and I has some great help while putting rafters up this year…Jason and Katie…both graduates of the Onalaska Log Building School came over with their Monster Van and were lifesavers.  We ended up being short two rafters and had to go back into the woods to fall four more trees.  Jason and Katie made it easy with their Monster Van.  With all the trouble we had getting those trees to lay down we should have just chained up the trees to the hitch of that nasty van and just had Jason drive home.  It sure would have made it simpler!  Thanks Jason and Katie!

South End ‘Hip’ Roof

Posted: August 31, 2016 in Uncategorized

This slideshow requires JavaScript.

Jack, of the Onalaska Log Building School, suggested a short roof on the south side of our cabin too help keep rain off the logs.  Our gable ends will overhang by a full 8’ but a little extra protection never hurt.  All we had to do was leave our loft joyce logs hang out an extra 5’ then lay the rafters after going up two more rows.  Slick.  Most of the photos you are looking at are from one of my three Game Cameras on site.  I will situate them for security when I leave for the winter…but for now they are set up to record our progress.  One downfall of adding the Hip Roof was that we could no longer pull logs up from two corners like normal.  With the hip roof in the way we had to lift wall logs up from one corner.  It took more time but will be well worth it in the end. 

Extender Logs

Posted: August 30, 2016 in Uncategorized

This slideshow requires JavaScript.

The cabin is 34’x28’…I probably mentioned that a ways back.  So that means with the gable ends hanging 8-9’ past the cabin wall the ridgepole and the EXTENDERS are 50’ long!  After we got up to the second floor…10 rows…we decided to add four additional rows.  We made that choice because we wanted the rafters to be at least four feet up from the loft floor so we would have extra room and not hit our heads too soon when walking to the edges of the loft.  Kapeesh?  So we added two normal rows…then on the long walls we added the 50’ extender logs…two on each long side.  Instead of passing normally past the walls they passed 8’.  This will allow us to set rafters out 7’ or so past the wall.  Then with 2×6 roof decking extending another 2-3 feet our total extension is very close to 10 feet.  That makes for wonderful log protection.  As usual Bonnie was our ‘go to’ winch specialist.  The new guy Tyler was our Designated Pinner(Sledge hammered rebar into the logs…over and over and over again.  5-600 pieces of rebar was pinned into this cabin.  Tyler didn’t pin them all).  Rob did everything that was asked of him as usual.  Me…well…I guess I did what was left.  We gained a mascot…Kona…Tyler’s 6 month old lab/pit mix.  Sweetest dog you’ll ever meet…lots of fun too…I may have thrown out my arm launching branches out into the forest for her to retrieve. 


Shed Dormer and Balcony

Posted: August 29, 2016 in Uncategorized

This slideshow requires JavaScript.

This Shed Dormer turned out better than expected.  Of course its not complete.  We still need to finish the walls and tie it into the roof.  But the framing looks great.  At first while I was designing it I thought three windows would be nice.  Let lots of light in to the great room and the loft.  But as it morphed into a balcony with two windows and a door I am thrilled at the design.  Jack and Sharon at the Onalaska Log Building School took a look a few days ago and agree that it turned out well.  Tyler has been a HUGE help since August 15.  Thanks Ty!

Row 11-12

Posted: August 25, 2016 in Uncategorized

This slideshow requires JavaScript.

11th and 12th rows…wow…this cabin is getting big!  I’ve included lots of pics that show the rigging we’ve used all along.  Only one log was placed by a boom truck…Big Red…the center post…the remaining over 100 logs have been raised by our lifting poles and pulley system.  You can see that we added a blue tarp during the 90 degree weather to shelter us from the sun…crazy for the NW.

Balcony

Posted: August 22, 2016 in Uncategorized

This slideshow requires JavaScript.

Almost one year ago when I was back in Florida building my log cabin model I came across a problem.  My gable dormers were not letting in sufficient light.  After just sitting on a stool staring at the model(I’m a visual kinda guy) I came up with this solution.  Instead of two small gable dormers I would make one long 16’ shed dormer.  Great…except for one thing…the logs below still needed protection from the rain.  Ok…make a scab roof under the shed dormer windows.  That didn’t work.  Then I saw it…instead of a short roof…level it out and make it a balcony.  Turn one of the three windows into a door…give the now joyce logs instead of the rafter logs a slight slope for water run off and all of a sudden you have a cool balcony you can sit at night and watch the sun set…perfect!  Well…kinda perfect.  Now…as usual…I’ve created a more complicated build.  That’s what life is for right…creativity…outside the box thinking.  Well…ok.  The balcony itself is up now…the issue over the next week will be to build the windows, doors and roof.  Watch as it goes up! How do you guys like the gnarly post logs!  I love ’em.  Oh yeah…a good friend of ours, Tyler, from Florida has come out to help us through the end of the summer…which is October 5th or so.  Thanks Ty!

Ridgepole Raised!

Posted: August 17, 2016 in Uncategorized

This slideshow requires JavaScript.

The raising of the ridgepole(RP) was fairly uneventful…and that is good unless you are filming for a reality show and the producer is hoping for some drama.  We put up good rope guy lines to beef up the lifting poles before we started lifting.  We also measured and cut the height of the two outside ridgepole posts to give us the 5/12 pitch of the roof we wanted.  Then we cut ‘cups’ into the posts to ‘cradle’ the ridgepole as we set it down.  We used very long…24” x 5/8” lag bolts to secure the RP to the post.  Big Red in the center of course gave us the most work.  Rob had to use his 30” chainsaw to cut a 6” hole in the middle top of Big Red to fit the post into.  Big Red was 3’ shorter than our other post so we had to extend it by using the post.  We will hollow out a large DF(Douglas Fir) and wrap it around the post for looks later.  It seems since the day I saw and bought that big tree its been testing both my patience and my wallet.  The cost of the tree was nothing compared to all the other expenses it has incurred.  Building the footing $700…cement $600…lifting it into position $300…top post to stretch it up to the RP $250.  Sheesh…a 16”x21’ DF(Douglas fir) would have cost me $75!  I sure hope we get lots of memories over the next years because of ‘ol Big Red.  So now the RP is up and we can start to work on the wall logs above the loft.  Cool.

First Ridgepole Post

Posted: July 20, 2016 in Uncategorized
DCIM100GOPROGOPR1094.

Bonnie helps use the Pievy to rotate the log for Jack.

DCIM100GOPROGOPR1120.

DCIM100GOPROGOPR1120.

DCIM100GOPROGOPR1098.

We use a piece of Pressure Treated wood between the log post and concrete because concrete will eventually rot the log.

DCIM100GOPROGOPR1100.

Positioning the north ridgepole post.  Again…no boom trucks were harmed(or used) in the positioning of these logs.

DCIM100GOPROGOPR1102.

Bonnie was always on hand to help in any way she could.

DCIM100GOPROGOPR1103.

This is my new favorite photo!

DCIM100GOPROGOPR1105.

It was a delicate balance of which side to pull in order to lift this center post into position.

DCIM100GOPROGOPR1107.

This center post will be 1 out of 3 logs to hold our ridge pole log up.  Big Red…our center post is in the upper right corner of this photo.

DCIM100GOPROGOPR1109.

Bonnie is on the jeep winch and Rob is on the tractor pulling this post into place.

DCIM100GOPROGOPR1112.

Success!

DCIM100GOPROGOPR1116.

This is my happy face.

DCIM100GOPROGOPR1117.

FYI…the 2′ square footings will hold 4×4″ posts and 4×8″ beams that will hold the 2×8″ joyce milled lumber for the floor.  You can see the joyce hangers along the top of the foundation.

DCIM100GOPROGOPR1120.

I am looking at a wall log that needs to be notched in order for the center post to fit correctly

DCIM100GOPROGOPR1121.

Notching the wall log.