Well…my second favorite log of course! 50 feet long…almost 18” at one end…it will extend eight feet past both ends of our cabin. With the extension of the 2×6 the roofing will extend a total of 10 feet past each gable end wall. That my friend is GREAT LOG PROTECTION FROM THE RAIN! It took five of us working as a team to get this bad boy onto the second floor deck…Jack, Rob, Sam, Bonnie and myself. From the photos you can see that we used the two north end sets of block and tackle to initially lift the RP up onto the deck edge. From there we brought the south end pulleys to replace those pulleys on the end and moved the north pulleys further back on the RP. Eventually with that strategy we slide the RP to a center point on deck. Next will be to hoist it straight up on to the three posts.
Archive for the ‘Stacking Logs’ Category
OK…we now have a half loft…but we need a temporary floor over the WHOLE floor. Because the joyce logs were cut long most of them spanned over the middle close to the north wall. I could have used scaffolding but thought that was too heavy and expensive. Later I will be using 16’x2x8’s for the main floor so I went ahead and ordered those to use as temporary loft extenders. We lagged 2×8’s into the north wall to act as a hanger and brought the 2×8 extenders over. We then had a strong temporary floor to extend over the Great Room to finish the wall logs and rafters. Later we will dismantle and use these logs as main floor joyce lumber. Ok…that was wordy…but I felt it was a good solution that some of you readers may use some day.
OK…here are a set of wonderful photos. The second floor. Fourteen 8” logs spaced 24” apart to be used to lay 2x6TG(tongue and groove) flooring on soon. I will attempt to have the patience to give you some details I think will be interesting. (It is 95 degrees outside and I am happy to be at the Flippin’ 50’s in Elma Washington eating their great food, using their AC and enjoying great hospitality).
My last post showed placing the joyce beams. Those two logs go east/west. One is lagged to Big Red and the other is place halfway between the south wall and Big Red. We use 5/8”x 14” lag screws. Now the joyce logs are pulled up on the south end and drug north to span the two beams and the south wall itself. Are you with me? Jack(of the Onalaska Log Building School) cut these logs long so we could use the portion that fit best. So Kara and I measured the diameter of each log and found the 8 1/2” point on each log and made a mark. We then pulled each log to this mark to the beam lagged into Big Red. That way we should be very close to level with all fourteen logs…important when we add the 2x6TG dimensional lumber for our floor. Are you still with me? We then lagged each log secure. I found $10 sheets of 3/4” used plywood on Craigslist and bought 30 sheets to make a temporary floor. My sister Kara helped screw them down.
Things are really starting to go UP here! We are getting close to the height of our second floor so we will be setting our joyce beams across the east and west walls in order to set our Joyce logs for our LOFT.


Jack had some relatives visiting from Germany so he brought them over to get the experience of building a log cabin. By the way…I am open to that for any of you to come over!
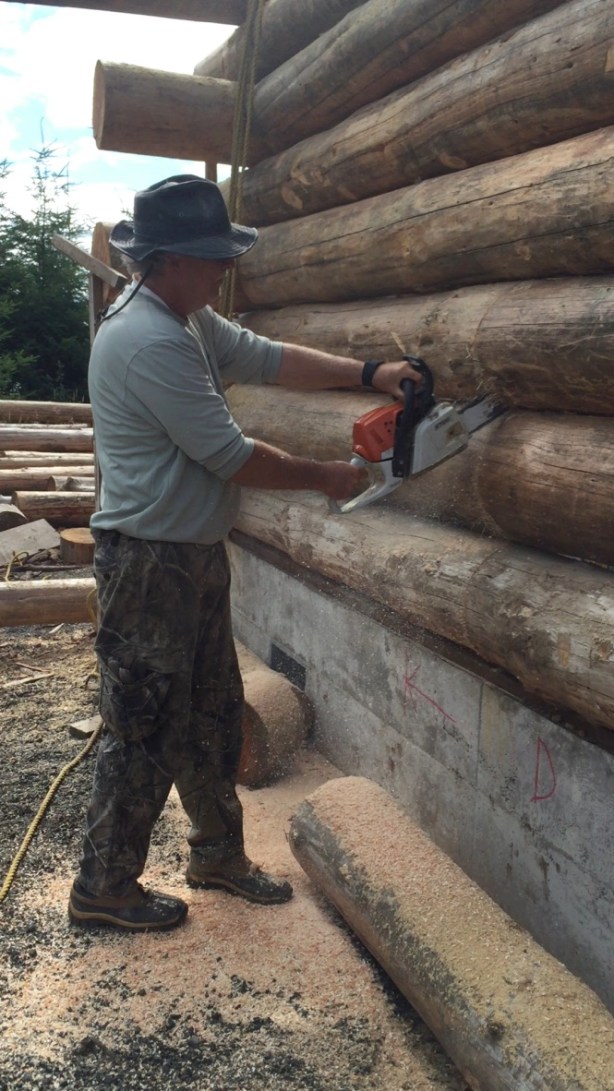
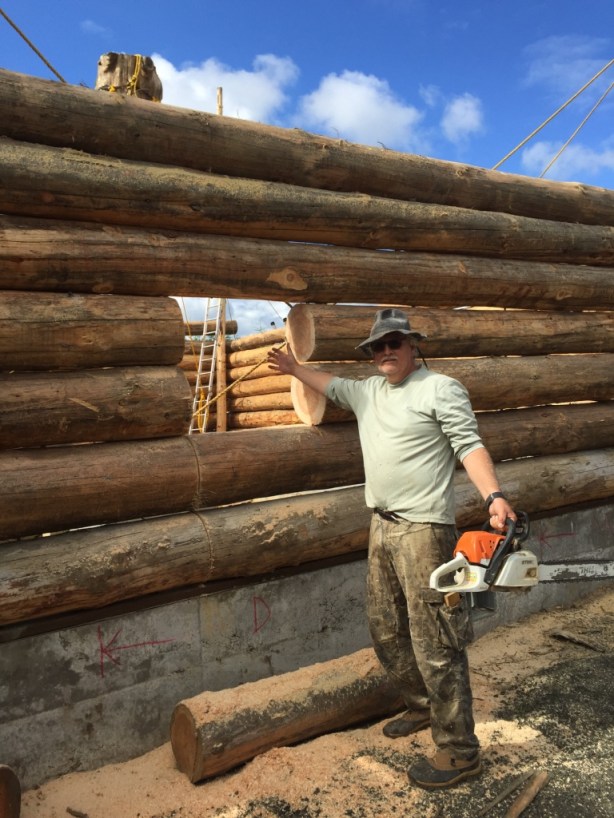
Pretty exciting to watch the logs go up row by row. It all happens pretty quick really since most of our lower logs were over a foot in diameter and it only takes one log per side to move on. Jeremy was still here on a ‘working vacation’ from Florida…thanks for all your help Jeremy! Swinging an 8lb sledge all day long made Jeremy a believer that building a log cabin was work. Sam has been a welcome addition to our work force as well. In a couple of the pics you see Jack and I wedging our saws in between logs cutting off knots that have kept the two logs from fitting together as tight as possible. The tighter the fit the less chinking will be relied upon for insulation. 1/2” rebar was pounded in every four feet with the exception of door and window locations…then allowances were made so as not to ‘run into’ rebar while cutting an opening at a later date. All total there will be over 800 pieces of rebar driven into the walls of this cabin. That is a lot of Icy Hot!
The second row of logs are pinned down with rebar. 1/2” this year…two years ago the engineer said use 5/8”…which was twice as hard to pound in with a sledge hammer. Not sure why the change of heart but we are glad for the smaller diameter rod. Placed every 4’ a 1/2” hole is drilled through the top log only…a length of rebar is chosen that will reach through the top log and penetrate into the second log half way. For example…if your top log is 12” and your second log is also 12” you will need an 18” length of rebar to correctly pin your log. Once the rebar is in the log will begin to shrink around the bar and form a very strong connection. Again…I said SHRINK…not SETTLE. I have a stack of over 500 pieces of rebar in varying lengths. I chose to have them cut at a small expense…you can save money and cut them yourself with a bolt cutter if you choose. The corners have extra rebar…one horizontally and one at a diagonal. We do quite a bit of knot cutting once the log is up and we find the right ‘fit’. Remember, this technique is called BUTT AND PASS. One log passes past then the next butts up against that one and passes on the opposite end…and so on and so on…
The most exciting row and definitely the most effort. Since it’s the ‘sill’ row(first) it needs to be attached to the foundation wall by 3/4” AT(all thread) in our case. Every 4’. That means that holes need to be drilled at precise locations in order to lower the log over all rods at once. There are different methods for sure but since our AT rods were NOT set in the concrete walls evenly and in a straight line we decided to lift the log over the rods…mark the locations…bring the log back to the ground and drill holes…then pray like crazy. Well, it worked well surprisingly. My strong suggestion is to position your rods in a precise line. Goes without saying I’m sure. You can see all the 2×2′ pads inside the foundation…where the floor posts will be set. We are using 2×8 floor joists as floor bracing. Milled lumber will be easier for floor level.
To lift our logs onto the foundation stem wall we use lifting poles. One in each corner. Buried 3’ into the ground and extending longer than your highest wall log. In our case we needed poles reaching over 24’ into the air. Once in place and buried you’ll need to climb up as far 20’ and double wrap chain to hold the upper pulley. Above that you’ll need to tie two lengths of rope that will stretch out like a circus tent at angles to hold the poles from bending to far inside. Then you’ll need two more ropes extending from top of pole to bottom of next pole over to provide more lateral support. Anyway…lots of stinking rope! First year I used 1600’ of 5/8” poly rope and this year I’ve gone through over 500’ more. Cheaper than a boom truck! $125 for a spool of 600’. We started to build a form for a sidewalk around the foundation but went with a layer of gravel instead. We have used 6 sets of pulleys to lift our logs. Most of my pulleys I found at garage sales, eBay and just getting the word out. You’ll also need lots of lengths of chain…with hooks on each end preferably.
